다음은 배포 Workflow에 대한 그림이다.
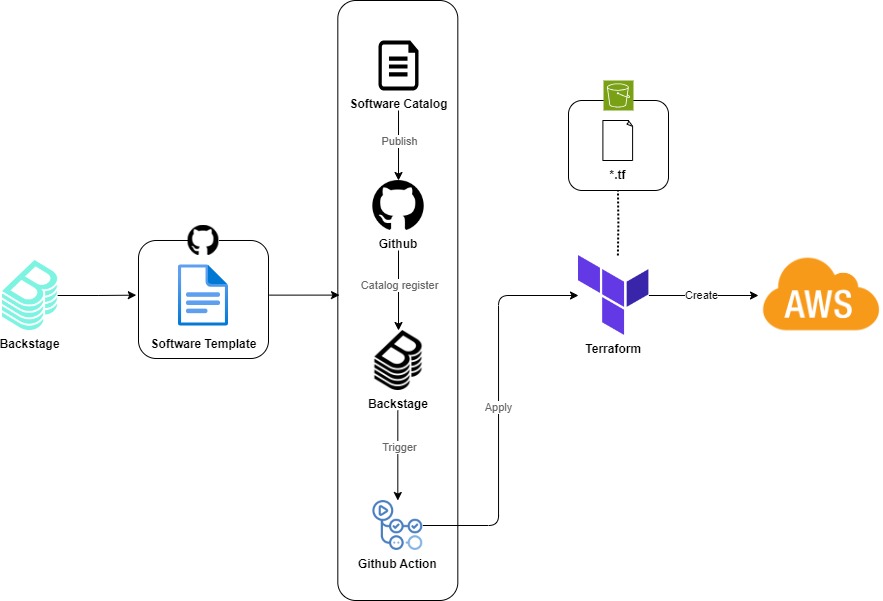
위 Workflow 과정을 간략하게 설명하면 다음과 같다.
- Backstage의 Software Template을 작성하여 Github repository에 보관한다.
- Software Template에는 아래와 같은 step들이 정의되어 차례로 진행된다.
- 미리 정의된 Software Catalog Template 파일이 입력값을 통해 수정되어 Github repository에 등록된다.
- Backstage의 Software Template에서 입력된 값을 사용하여 미리 정의된 Github Action 파일을 통해 runner가 실행된다.
- Github repository에 등록된 Software Catalog 파일을 통해 Backstage catalog에 서비스가 등록된다.
- runner에 의해 Terraform이 실행되며, Terraform 파일들은 AWS S3에 보관된다.
- Terraform 실행에 의해 AWS 리소스가 배포된다.
이번 글에서는 Backstage를 통해 EC2 인스턴스를 배포하는 실습을 진행해보려 한다.
구성 환경
- Amazon EC2 Instance
구성 버전
- Backstage : 1.27.0
- EC2 : Amazon2023-6.1.59-84.139.amzn2023.x86_64
전제 조건
- AWS S3 생성
- AWS Credentials
- Github 계정
- Backstage 구성
1. Backstage Software Template 작성
다음 Tree 구조와 같이 Github repository에 Template 파일을 보관한다.
├── content
│   ├── component-info.yaml
│   ├── index.js
│   ├── package.json
├── template.yaml
다음 파일들을 Github repository에 등록한다.
- template.yaml
- Github Action 파일이 존재하는 '{github_repo}' 부분을 적절히 기입한다.
apiVersion: scaffolder.backstage.io/v1beta3
kind: Template
metadata:
  name: create-ec2-instance
  title: Create an EC2 Instance
  description: Create an Instance to deploy your application
  tags: ['recommended']
spec:
  owner: guests
  type: service
  parameters:
    - title: EC2 Instance Creation
      required:
         - InstanceName
         - Region
         - InstanceType
      properties:
        InstanceName:
          title: Instance Name.
          type: string
          description: Name of the Instnace to be created.
          ui:autofocus: true
          ui:options:
            rows: 5

        Region:
          title:  AWS Region
          type: string
          description: Name of the region where you want to create your create-ec2-instance eg:- us-east-1, ap-south-1 etc.

        InstanceType:
          title: Type of Instance.
          type: string
          description: Type of the instance that you want to deploy, for eg:- t2.medium, t3.medium etc.
          enum:
            - t2.medium
            - t2.small
            - t2.micro
            - t3.medium
        action:
          title: action
          type: string
          description: What action do you want to perform? Create or delete?
          enum:
            - apply
            - destroy
          default: apply

    - title: Choose a Repository Location
      required:
        - repoUrl
      properties:
        repoUrl:
          title: Location of the repository
          type: string
          ui:field: RepoUrlPicker
          ui:options:
            allowedHosts:
              - github.com

  steps:
    - id: fetch-base
      name: Fetching Details from content folder
      action: fetch:template
      input:
        url: ./content
        values:
          name: ${{ parameters.InstanceName }}

    - id: rename
      name: Rename solution and project files
      action: fs:rename
      input:
        files:
          - from: ./component-info.yaml
            to: ./${{ parameters.InstanceName }}-component-info.yaml

    - id: publish
      name: Publishing Details
      action: publish:github
      input:
        allowedHosts: ['github.com']
        description: This repo is to create an ec2 instance ${{ parameters.InstanceName }} using backstage.
        repoUrl: ${{ parameters.repoUrl }}
        repoVisibility: public # or 'internal' or 'private'

    - id: register
      name: Registering the new Component
      action: catalog:register
      input:
        repoContentsUrl: ${{steps['publish'].output.repoContentsUrl }}
        catalogInfoPath: '/${{ parameters.InstanceName }}-component-info.yaml'

    - id: github-action
      name: Starting GitHub action
      action: github:actions:dispatch
      input:
        workflowId: instance.yml # ID of GitHub action WorkFlow
        repoUrl: {github_repo} # 형식: 'github.com?repo={repo_name}&owner={github_Owner}'
        branchOrTagName: 'main'
        workflowInputs:
          instanceName: ${{ parameters.InstanceName }}
          awsRegion: ${{ parameters.Region }}
          instanceType: ${{ parameters.InstanceType }}
          action: ${{ parameters.action }}

  output:
    links:
      - title: Repository
        url: ${{ steps['publish'].output.remoteUrl }}
      - title: Open in catalog
        icon: catalog
        entityRef: ${{ steps['register'].output.entityRef }}
- content/index.js
console.log('Hey!! ${{ values.name }} instance is getting created. ');
- content/package.json
{
    "name": ${{ values.name }},
    "private": true,
    "dependencies": {}
}
'Github Owner' 정보와 'Github Repo' 정보를 적절히 기입하여 생성한다.
- content/component-info.yaml
apiVersion: backstage.io/v1alpha1
kind: Component
metadata:
  name: ${{ values.name }}
  annotations:
    github.com/project-slug: {Github Owner}/{Github Repo}
    backstage.io/techdocs-ref: dir:.
  title: '${{ values.name | dump }} / EC2 instance'
  description: 'An example of a Instance Creation.'
spec:
  type: service
  owner: guests
  lifecycle: experimental
Backstage의 app-config.yaml 파일을 다음과 같이 추가한다.
- app-config.yaml
...
catalog:
...
  locations:
    - type: url
      target: https://github.com/{Owner}/{repo_name}/tree/{branch}/template.yaml
      rules:
        - allow: [Template]
2. Github Action 플러그인 설정
먼저 Backstage에 github action 패키지를 다운로드한다.
$ yarn --cwd packages/app add @backstage/plugin-github-actions
다음과 같이 frontend 코드 내용을 추가 및 수정한다.
- packages/app/src/components/catalog/EntityPage.tsx
import { EntityGithubActionsContent } from '@backstage/plugin-github-actions';
import { EntityRecentGithubActionsRunsCard } from '@backstage/plugin-github-actions';
...
const serviceEntityPage = (
  <EntityLayout.Route path="/ci-cd" title="CI/CD">
    <EntityGithubActionsContent />
  </EntityLayout.Route>
);

...

const overviewContent = (
  <Grid container spacing={3} alignItems="stretch">
    ...
    <Grid item sm={6}>
      <EntityRecentGithubActionsRunsCard limit={4} variant="gridItem" />
    </Grid>
  </Grid>
);
다음과 같이 backend 코드 내용을 추가한다. 해당 코드는 Backstage 템플릿의 "action: publish:github" 동작을 위해 필요하다.
- packages/backend/src/index.ts
const backend = createBackend();
# ...
backend.add(import('@backstage/plugin-scaffolder-backend-module-github'));
# ...
backend.start();
3. Github Action 파일 설정
다음과 같은 Tree 구조로 Github Action 설정파일이 위치한 곳에 Terraform ‘*.tf’ 파일을 같이 위치시킨다.
├── .github/workflows
│   ├── instance.yml  # github action 파일
├── main.tf           # Terraform 파일
├── variables.tf      # Terraform 파일
Github Action을 위한 파일 생성 및 설정을 한다.
- .github/workflows/instance.yml
- S3_name 부분에 적절한 AWS S3 이름을 입력한다.
name: Create an ec2 instance
on:
  workflow_dispatch:
    inputs:
      instanceName:
        description: 'Name of the AWS Instance'
        required: true
      awsRegion:
        description: 'AWS Region for the instance'
        required: true
      instanceType:
        type: choice
        description: 'AWS instance type'
        required: true
        options:
        - t2.medium
        - t2.small
        - t2.micro
        - t3.medium
      action:
        description: 'Action to perform (apply/destroy)'
        required: true

jobs:
  apply_ec2:
    runs-on: self-hosted

    if: ${{ github.event.inputs.action == 'apply' }}
    steps:
    - name: Checkout code
      uses: actions/checkout@v2
      with:
        path: ${{ github.event.inputs.instanceName }}

    - name: Configure AWS credentials
      uses: aws-actions/configure-aws-credentials@v2
      with:
        aws-access-key-id: ${{ secrets.AWS_ACCESS_KEY_ID }}
        aws-secret-access-key: ${{ secrets.AWS_SECRET_ACCESS_KEY }}
        aws-region: ${{ github.event.inputs.awsRegion }}

    - name: make directory
      run: mkdir -p ${{ github.event.inputs.instanceName }} > /dev/null 2>&1

    - name: Install Terraform state file
      run: aws s3 cp s3://{S3_name}/${{ github.event.inputs.instanceName }}/ ./${{ github.event.inputs.instanceName }} --recursive
      continue-on-error: true

    - name: Terraform Init
      run: terraform init
      working-directory: ${{ github.event.inputs.instanceName }}

    - name: Terraform Format
      run: terraform fmt
      working-directory: ${{ github.event.inputs.instanceName }}

    - name: Terraform Validate
      run: terraform validate
      working-directory: ${{ github.event.inputs.instanceName }}

    - name: terraform apply
      run: terraform apply -var instanceName=${{ github.event.inputs.instanceName }} -var awsRegion=${{ github.event.inputs.awsRegion }} -var instanceType=${{ github.event.inputs.instanceType }} -auto-approve
      working-directory: ${{ github.event.inputs.instanceName }}

    - name: Upload Terraform state file
      run: aws s3 cp ./${{ github.event.inputs.instanceName }} s3://{S3_name}/${{ github.event.inputs.instanceName }} --recursive --exclude ".git*" --exclude ".terraform*"

  destroy_instance:
    runs-on: self-hosted

    if: ${{ github.event.inputs.action == 'destroy' }}

    steps:
    - name: Checkout code
      uses: actions/checkout@v2
      with:
        path: ${{ github.event.inputs.instanceName }}

    - name: Configure AWS credentials
      uses: aws-actions/configure-aws-credentials@v2
      with:
        aws-access-key-id: ${{ secrets.AWS_ACCESS_KEY_ID }}
        aws-secret-access-key: ${{ secrets.AWS_SECRET_ACCESS_KEY }}
        aws-region: ${{ github.event.inputs.awsRegion }}

    - name: Install Terraform state file
      run: aws s3 cp s3://wlsdn-s3/${{ github.event.inputs.instanceName }}/ ./${{ github.event.inputs.instanceName }} --recursive

    - name: Terraform Init
      run: terraform init
      working-directory: ${{ github.event.inputs.instanceName }}

    - name: Terraform FMT
      run: terraform fmt
      working-directory: ${{ github.event.inputs.instanceName }}

    - name: Terraform Destroy
      run: terraform destroy -var instanceName=${{ github.event.inputs.instanceName }} -var awsRegion=${{ github.event.inputs.awsRegion }} -var instanceType=${{ github.event.inputs.instanceType }} -auto-approve
      working-directory: ${{ github.event.inputs.instanceName }}

    - name: Upload Terraform state file
      run: aws s3 cp ./${{ github.event.inputs.instanceName }} s3://{S3_name}/${{ github.event.inputs.instanceName }} --recursive --exclude ".git*" --exclude ".terraform*"
Github Action에서 시크릿을 사용할 수 있게 repository의 Secret을 설정한다.
- Github repo 접속 → Settings → Secrets and variables → Actions → New repository secret

Github Action을 실행할 Runner를 환경에 맞게 등록 후 실행한다. 여기서는 self-hosted로 실행한다.
- Github repo 접속 → Settings → Actions → Runners → Net self-hosted runner

4. Backstage에서 AWS 리소스 배포
Backstage를 실행 후 웹브라우저에서 UI에 접근한다.
$ yarn dev

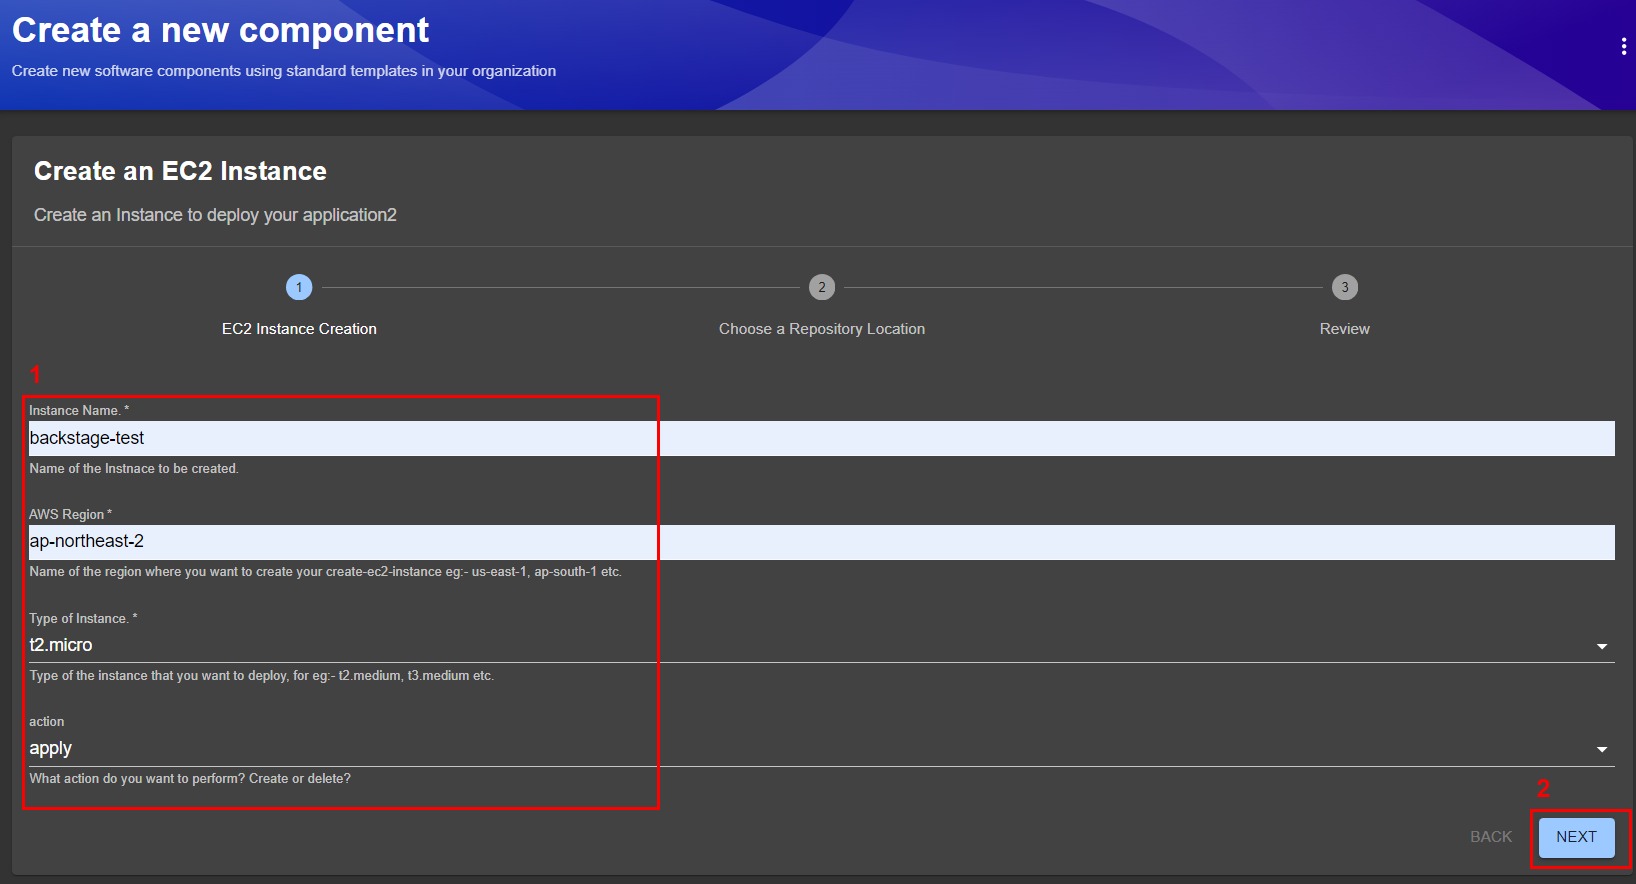
앞전에 생성된 Template 파일을 선택한다.

각 입력란에 적절히 입력 후 NEXT를 클릭한다.
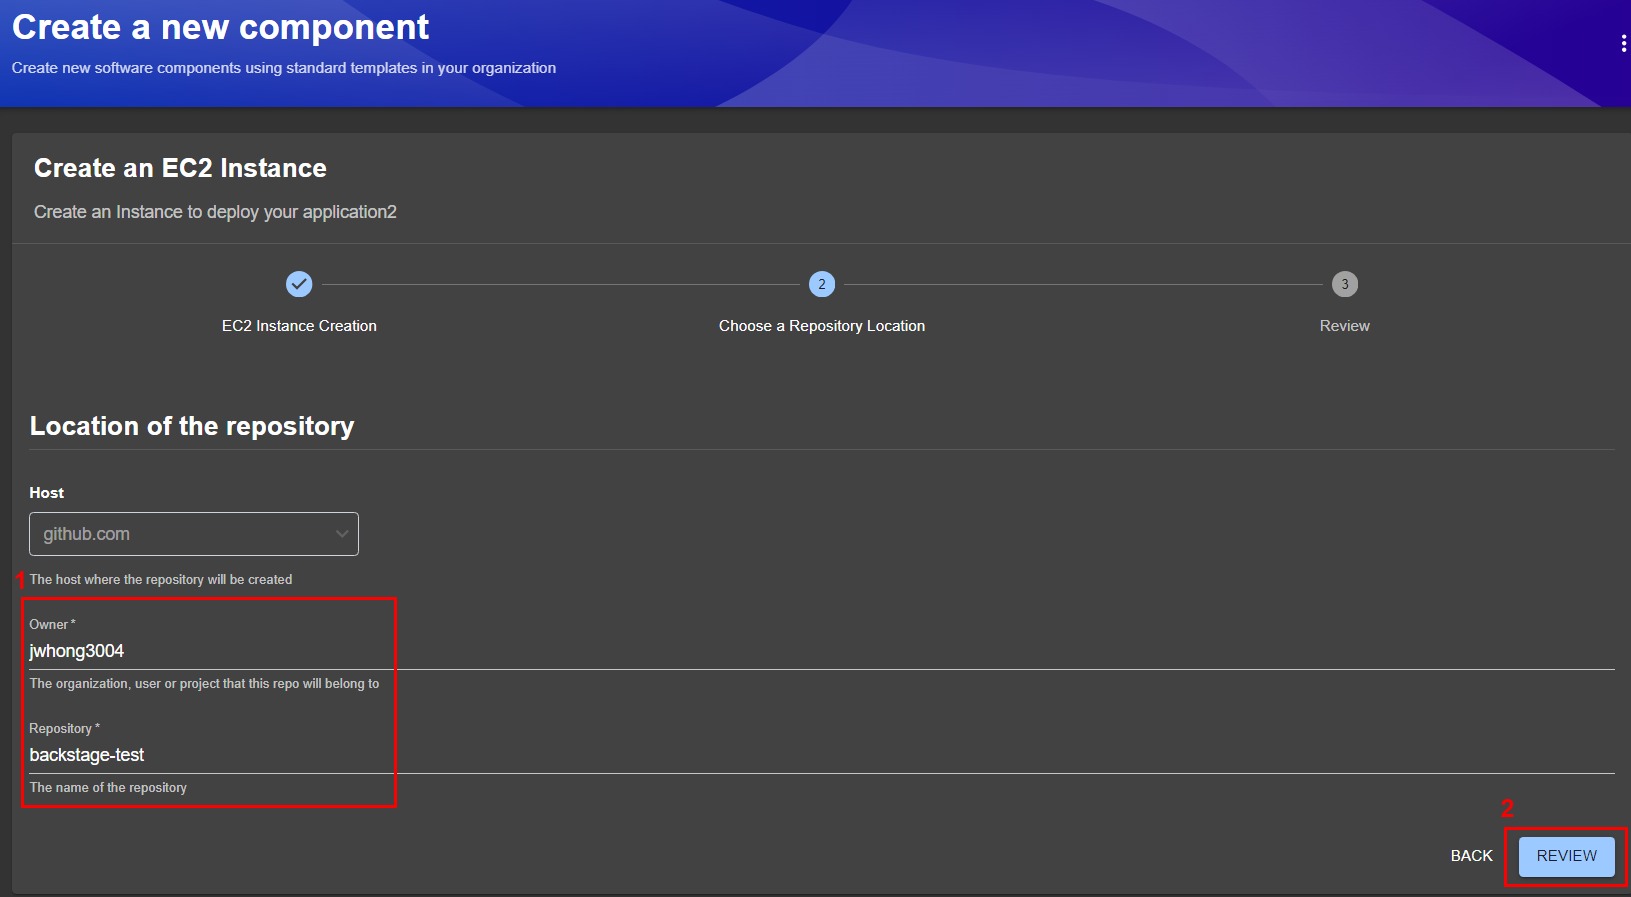
Github의 Owner와 Repository를 적절히 입력 후 REVIEW를 클릭한다.
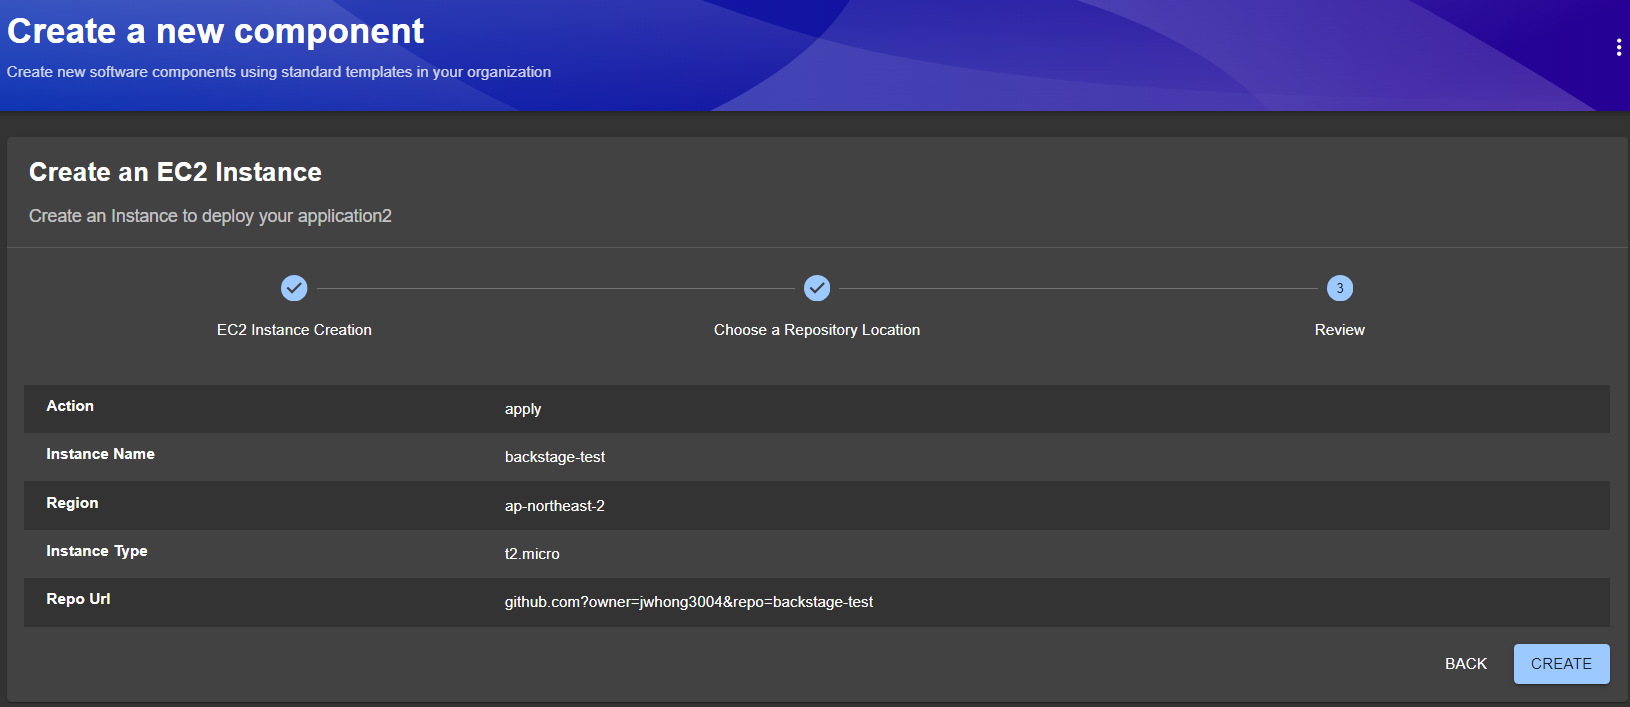
실제 어떻게 생성될 것인지 입력값에 대한 정보가 출력된다. 확인 후 CREATE 버튼을 클릭한다.
주의
다음과 같은 에러가 발생하면 "NODE_OPTIONS=--no-node-snapshot" 환경 변수 설정 후 backstage를 실행해야 한다.
"When using Node.js version 20 or newer, the scaffolder backend plugin requires that it be started with the --no-node-snapshot option. Please make sure that you have NODE_OPTIONS=--no-node-snapshot in your environment."
Software Template에 정의되어 있는 step들이 단계별로 실행되는 걸 확인할 수 있다.

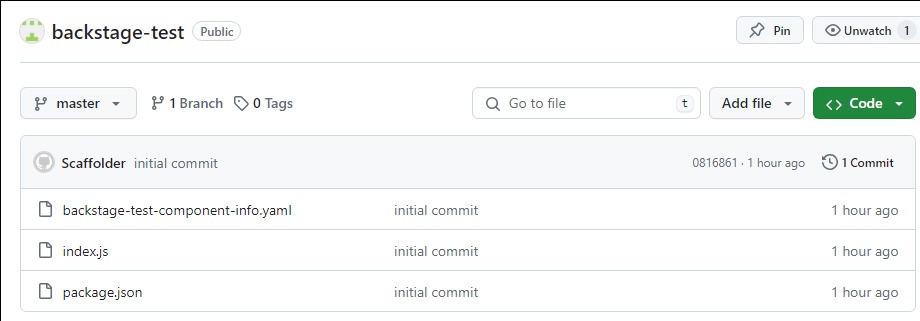
'REPOSITORY'를 클릭하여 생성된 Github repository와 catalog component 파일이 등록되었는지 확인한다.
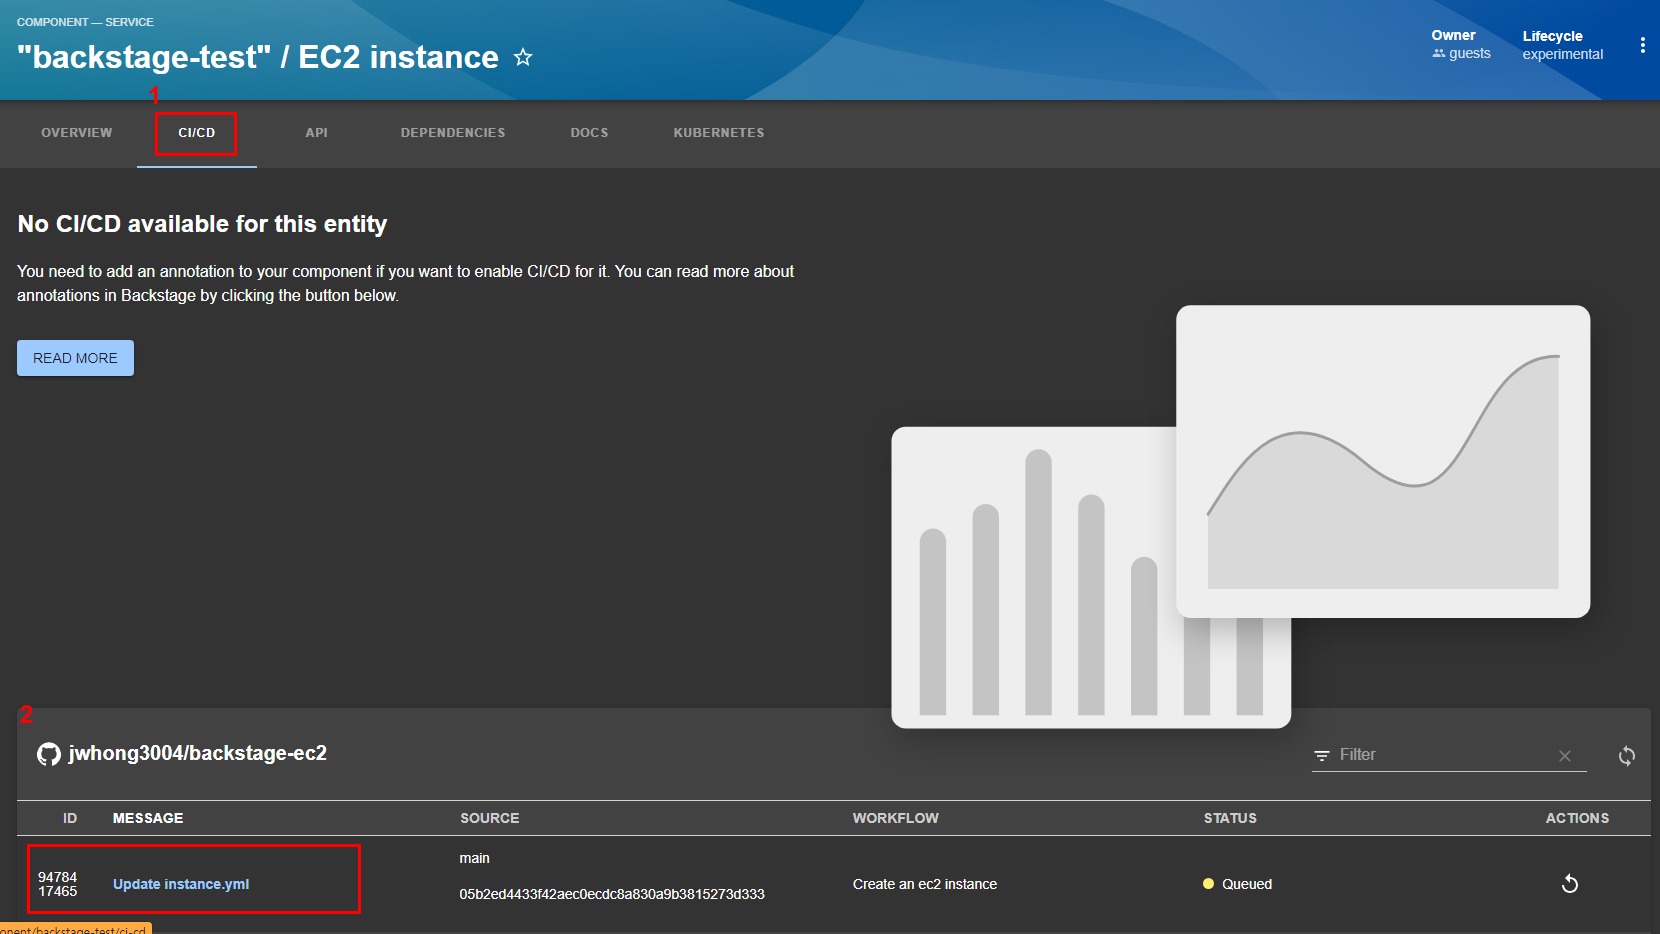
'OPEN IN CATALOG'를 클릭하면 등록된 catalog를 확인할 수 있고, 이후 CI/CD 탭을 클릭하면 다음과 같이 미리 정의한 Github Action이 실행되는 걸 확인할 수 있다.
Message 부분을 클릭하여 좀 더 자세히 확인한다.
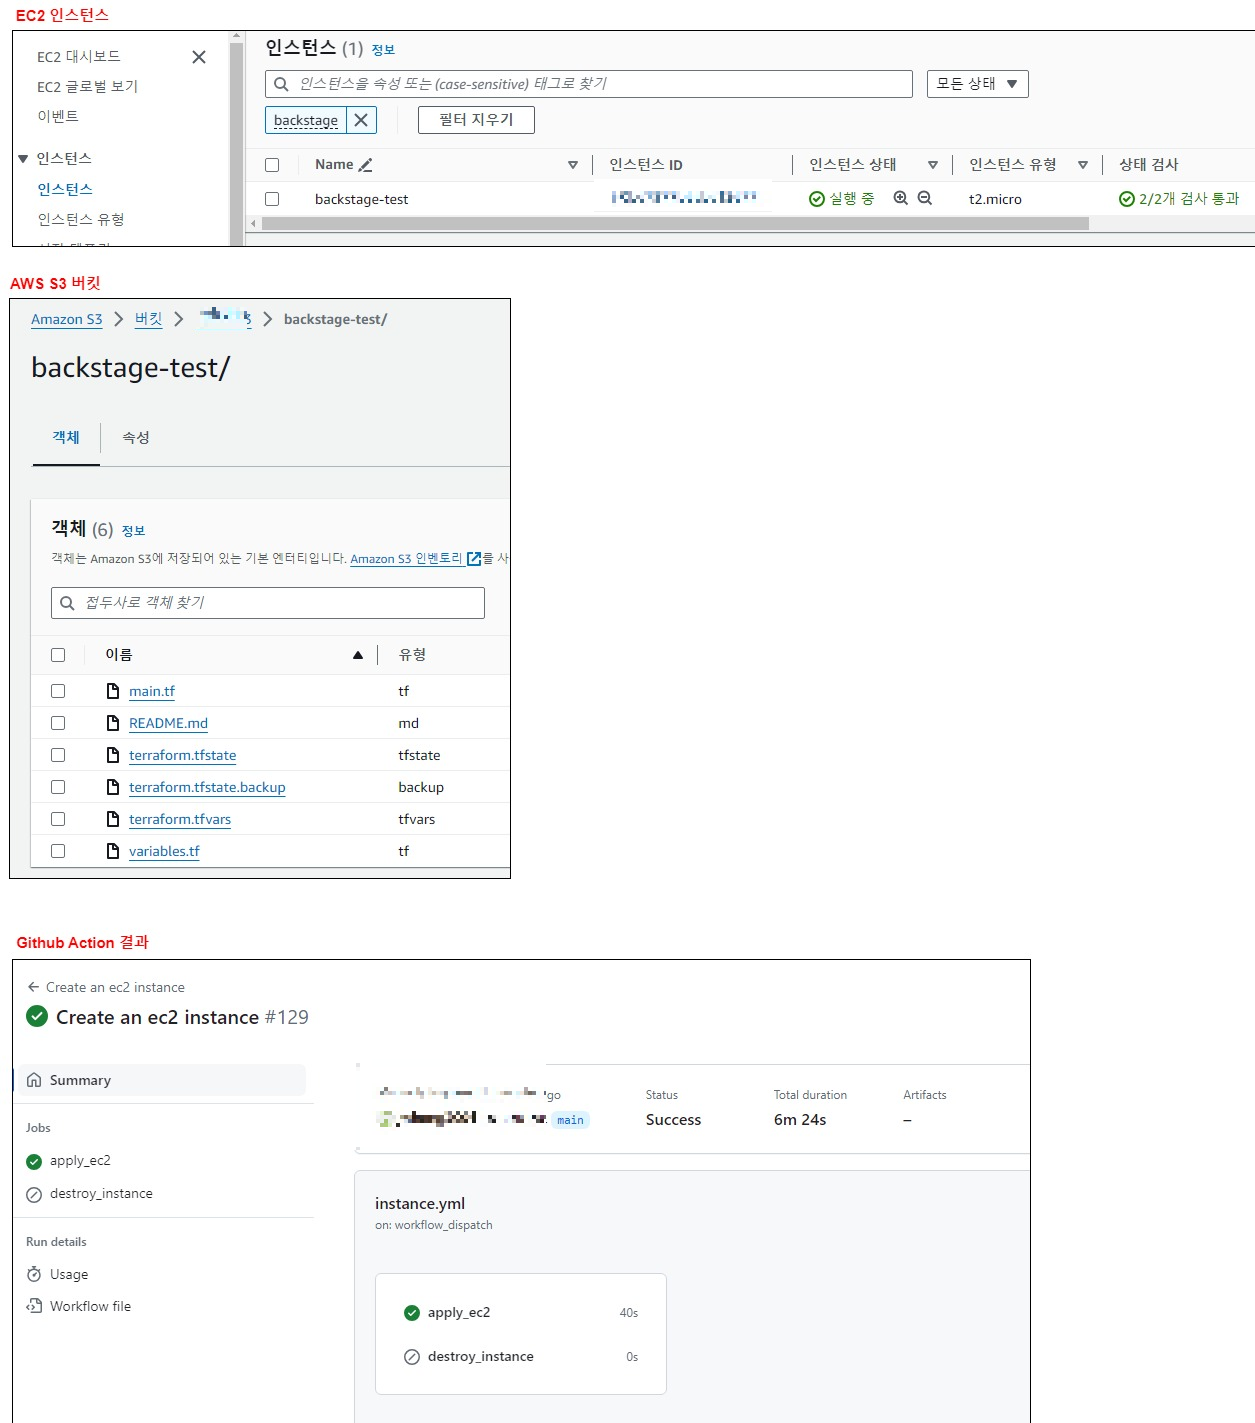
Github Action의 Workflow를 자세히 확인할 수 있고, 'JOB LOG'를 통해 실제 Terraform apply가 수행된 결과를 확인할 수 있다.

실제 EC2 리소스가 정상 생성되었는지, S3 버킷에 Terraform 파일들이 업로드되었는지, Github Action이 정상 실행 되었는지 확인한다.
'Developer Portal > Backstage' 카테고리의 다른 글
| [Backstage]란? 개념부터 설치까지 (0) | 2024.07.11 |
|---|---|
| [Backstage]와 ArgoCD 통합하기 (0) | 2024.06.27 |
| [Backstage]와 Kubernetes 통합하기 (0) | 2024.06.26 |


댓글